
Tags
Well – as I indicated this blog is mainly about sewing – and a few other things! One of those other things is my love of ballet!
I started ballet at age 5 – and continued until I was 15, when I was en pointe for the last 6 months. I left to concentrate on my school exams and then left it all behind when I joining the WRNS at 18.
For the photos below, remember you can right click to view them zoomed in!
 Here are my first pair of pointe shoes from way back then. They are Freeds in size 4 1/2 – though I have no idea what the style is or even if they had that many styles back then!
I aways wanted to go back, and at the grand old age of 62 I achieved that – at least dancing on ballet flats. I had searched about 20 years ago for a class but there was nothing available. Eventually my husband pushed me into it – and I am so grateful!
Here are my first adult ballet slippers!
It has only taken me 18 months since I started back to ballet to be able to do my first en pointe class. This has really surprized me. What an experience! This is in no small measure due to my teacher – Vanessa Searle at Rochelle Ballet and Performing Arts.
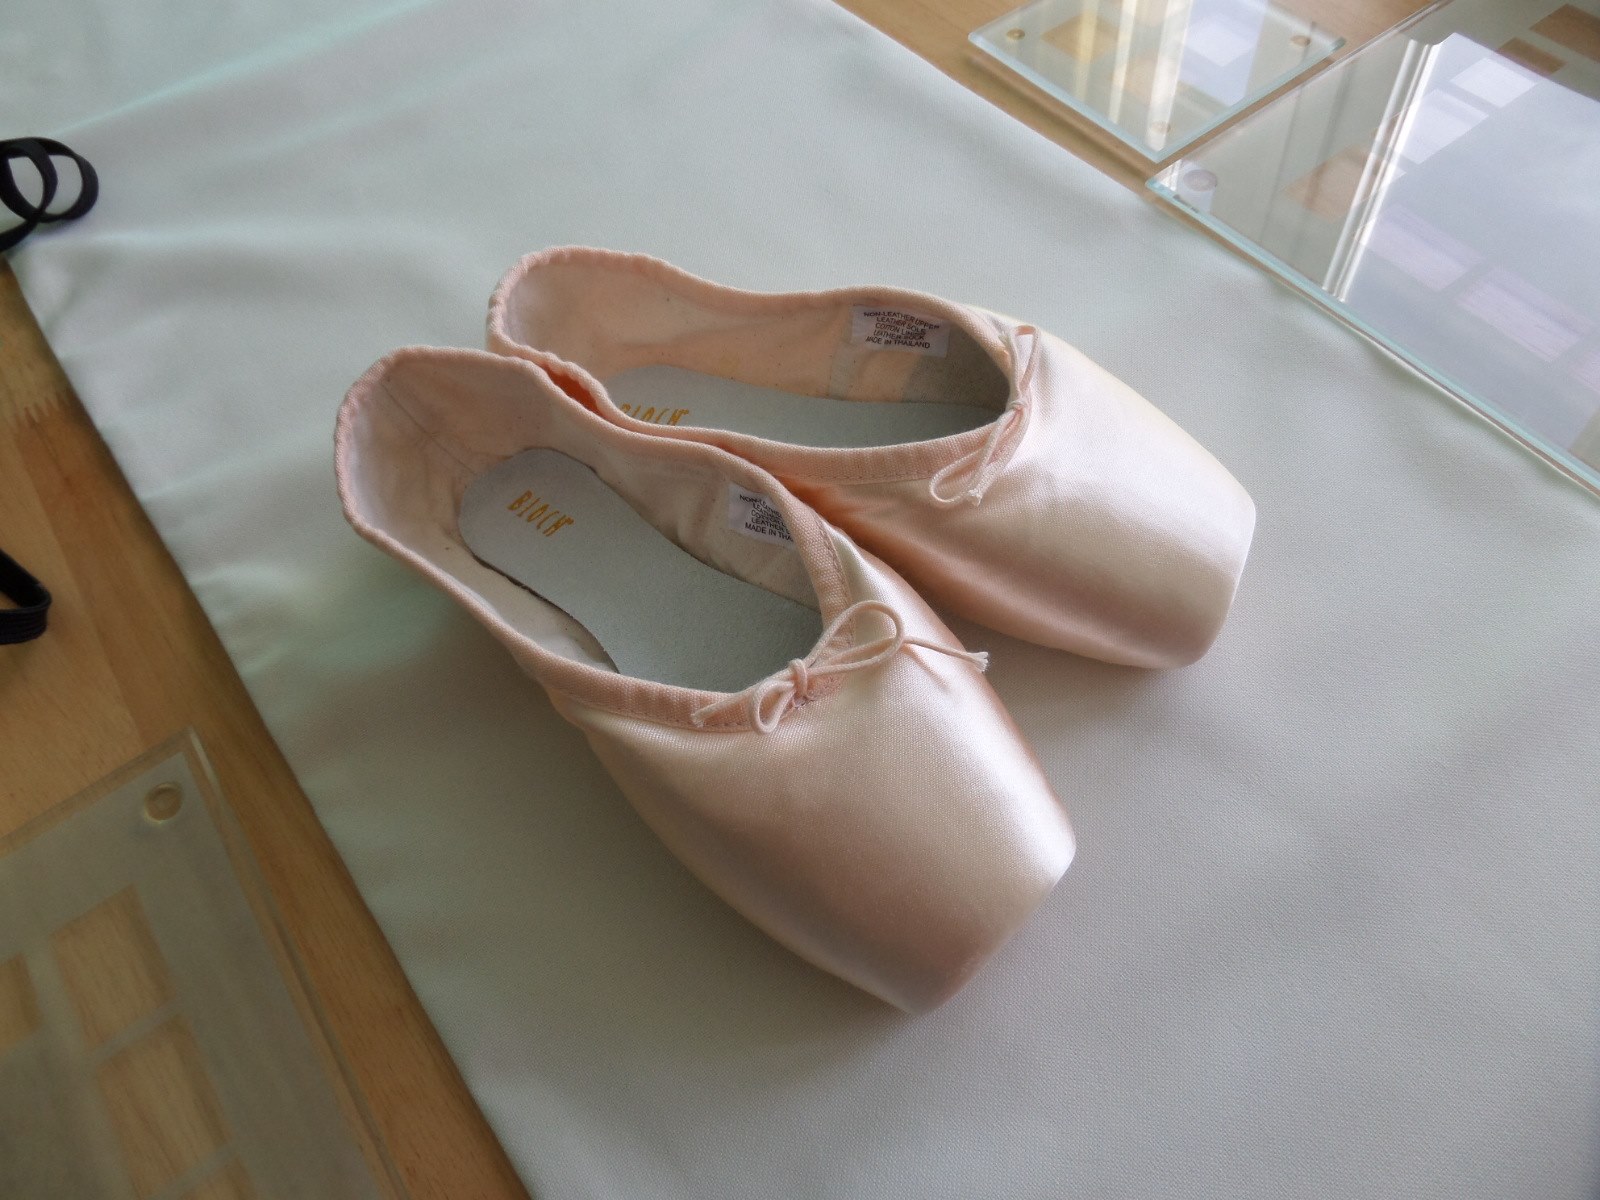
But to get back to sewing. I went for my pointe shoe fitting 2 weeks ago. I tried both Bloch and Capezio shoes on, and in so many different sizes and widths and styles – I ended up with ‘Bloch Hannah‘ in size 5 XX. I normally take street shoes in size 4 but a wide fit.
‘Hannah’ has a flat box with short vamp (to suit my short toes) which suits my feet perfectly and actually reminds me of my old Freeds from 1963! However with all the padding that is available now they feel so much more comfortable – at least after my first class!
Here are the ones I ended up with.

Of course in order to wear them I had to sew ribbons on – I may also need elastic to hold the back heel up, but I’ve only got ribbons on at the moment.
Here they are with the ribbons all sewn on.

People have various ways to sew the ribbons on, and also ideas about where exactly to sew them. Below is the method I used for mine.
Preparing the ribbons
- Cut your length of ribbon into 4 equal pieces – 2 for each shoe.
- Fold the end of the first ribbon over twice and stab stitch through the ribbon near the top fold – this is to hold the fold in place and stop it slipping when you attach the ribbon to the shoe. Do check out where I have indicated in the photo – this shows where the stab stitches are – please note these stitches are purely through the ribbon before it is attached, not through the shoe!


Preparing the shoe and ribbon placement
- Fold the heel down and make a mark where it touches the shoe on either side. I made my mark with a Frixion pen and this can be removed by pressing lightly with an iron as the heat makes the ink disappear.

- Place your ribbon so the side is on one of the marks you made, then tilt it to a slight forward angle – this ensures you don’t get any bagging at the front of your instep when wearing them.
- Pin in place
- Do the same with the second ribbon
- Try the shoe on and tie the ribbons and ensure the angle is right before going any further.

Sewing the ribbons
Choose a decent size needle since at times you are going through several thicknesses of ribbon and fabric and a really thin needle will bend. You may need a thimble to help push the needle through, though I didn’t need one.
The thread I used is Guttermans polyester sewing thread in colour CA02776 which exactly matches the ribbon and binding stitching colour that seems to be available generally. Its stronger than a cotton thread, but fine enough to not really be visible when sewing through the binding (as described below).
Here you can see the thread and the needle I used – 
- Start sewing at one side of the ribbon but using a double or even triple stitch. This avoids any knots and I’ve never had the stitches come out where ever I have used this method to start a thread.
- Continue sewing down the side along the bottom and up the other side using a slip stitch, only catching the first layer of fabric in the shoe – so not going through to the satin – but going through all the layers of ribbon.
- When you’ve finished the second side attach the very top of the ribbon to the very top of the binding using ladder stitch. Be very careful that you do not stitch through the drawstring within the binding otherwise you will not be able to pull your shoes tight on your feet! Test every few stitches that you can still pull up the drawstring – if not then undo the stitches and try again. Finish off with another double or triple stitch and trim the thread.
Sewing through the binding
- This next bit of sewing is actually something I have never seen mentioned anywhere else, but I think it makes the ribbons more secure.
- Start again with a double stitch just near the stitching in the binding where the ribbon crosses it.
- Take a stitch right through all the ribbon, shoe and binding exactly where there is a hole a binding stitch has made.
- Continue stabbing back and fore through all layers following exactly where the binding stitches are and then work back the other way, finishing again with a double stitch. If this is done carefully with the thread I’ve advised you will not be able to really see any stitches.
This is what it should look like from both sides when you have finished. Because the colour of my thread matches the binding stitching all you see on the outside if you look really hard is that the stitches look a bit wider and more pronounced but this doesn’t show from a distance.


Sorting the ribbons
- Once you have finished stitching try your shoes on and confirm everything is in the right place. Tie the ribbons the usual way for attaching to your feet and tie the knot on the inside as usual. You should have too much ribbon to easily tuck in.
- Trim your ribbons, but not too short otherwise you will have to start all over again. However before you trim them you need to be aware that the outside one will be shorter than the inside one, due to not wrapping as much round your ankle. This means you would not be able to wear it on your other foot. You may want to leave the ribbons the same length as the inside ribbon in case you wanted to swap feet, or at least until you have decided which shoe will be right and which left.
- The ends of your ribbons will fray if you don’t do anything to them. You can either use a flame to very slightly seal the ends (as the ribbons are made from polyester satin) or cut them in a V shape, which while it works ok does not last forever, but I think looks much nicer! Of course you could do both – cut them in a V and seal with a flame. I don’t know if fray check might also work, so could be worth a try.
 Here is a comparison between my old Freeds and the new Bloch shoes – the style does look very similar to me!

And here I am just to show that the ribbons are working well and the shoes stay on my feet!
